
How do I replace the batteries in my AV-400 solar engine?
Step-by-step instructions for safely removing and replacing the two batteries in the AV-400 solar engine.
⚠ Remove metal jewelry — bracelets, watches, and rings — before handling the batteries. Contact with battery terminals can cause a short circuit, sparks, or burns.
ℹ The AV-400 uses two batteries. Both must be replaced at the same time. Do not mix old and new batteries or mix 7Ah and 9Ah batteries in the same solar engine.
Remove the old batteries
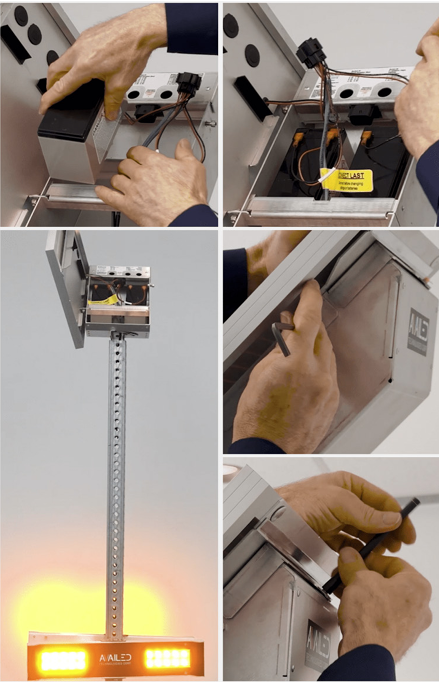
- Loosen the lid retaining screw and open the lid.
- Disconnect the battery harness connector from the controller — unplug the connector that links the battery wiring to the controller board.
- Disconnect the quick-connect battery wires from both batteries — pull the connectors straight off the terminals. Do not pull by the wire.
- Lift both batteries out of the solar engine.
Install the new batteries
-
Place both new batteries into the solar engine with the battery terminals at the top.
Connect the quick-connect battery wires to the correct terminals on each battery:- Red wire → positive terminal (+)
- Black wire → negative terminal (−)
- Connect the battery harness to the controller. The RRFB(s) will begin flashing for the set duration as soon as the harness is connected.
- Close the lid — compress it firmly and tighten the lid retaining screw to secure it.
✕ Do not reverse battery polarity. Red wire must connect to the positive terminal (+) and black wire to the negative terminal (−) on each battery. Reversing polarity will damage the system.